
If you’re dropping into the Rust Belt with starter gear and wondering why you keep getting melted by other Raiders, the answer lies in Speranza’s Workshop. The Workshop isn’t just some side system you can ignore. These crafting stations are your entire progression loop in Arc Raiders. Every successful extraction, every ARC machine you dismantle, every container you crack open, each material you gather, feeds directly into this crafting ecosystem. Understanding how to prioritize your workshop upgrades will make the difference between constantly losing your gear and actually making it out alive with that sweet loot.
Highlights & Takeaways
- Workshop is Your Lifeline: This isn’t just a crafting menu; it’s the core of your progression in Arc Raiders.
- Prioritize Survivability: Get your Gear Bench to Level 2 ASAP for Medium Shields and crucial Augments.
- Smart Resource Management: Upgrade the Refiner early to manage your inventory and unlock higher-tier crafting.
- Upgrade Smartly: A focused upgrade path means surviving longer and extracting more loot, faster.
What is the Workshop in Arc Raiders?
The Workshop is your crafting hub in Speranza where you transform raw materials into weapons, consumables, ammo, and more. You’ve got seven specialized stations, each handling different gear categories. Most upgrade tiers unlock new items and let you access more advance blueprints you may have found out in the field so you can produce progressively stronger weapons, better healing items, advanced tactical gadgets, and defensive gear that actually keeps you alive.
The Seven Workshop Stations
Your Workshop includes these stations:
Workbench – This is your starter bench. It handles ammunition crafting for all weapon types (light, medium, heavy, and shotgun shells), plus basic weapons like the Ferro and Hairpin. You’ll use this throughout your entire playthrough whenever you need to restock ammo.
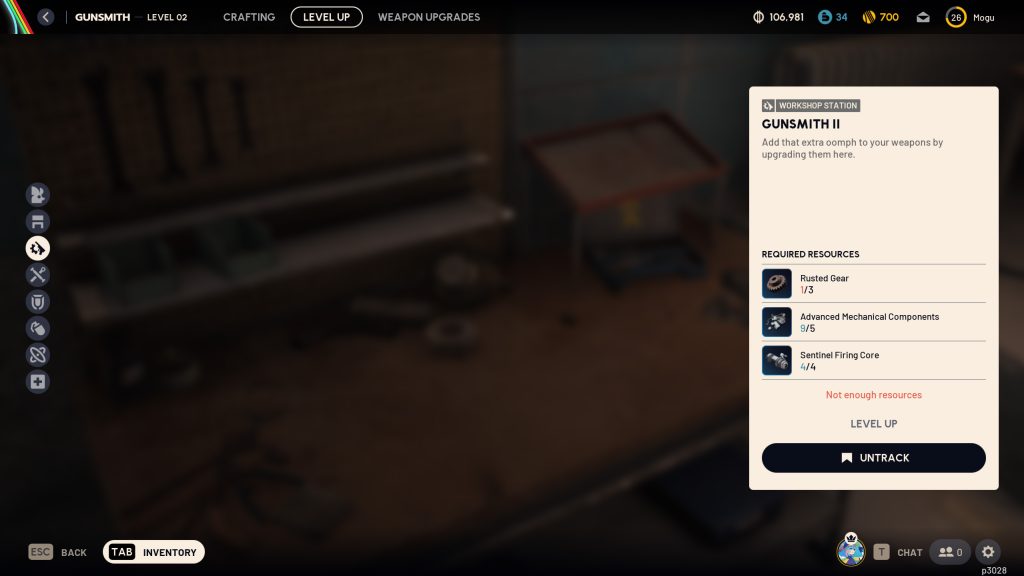
Gunsmith – Weapons and weapon modifications live here. Upgrading unlocks better firearms and attachments that dramatically improve your combat effectiveness, assuming you’ve found blueprints for them, of course.
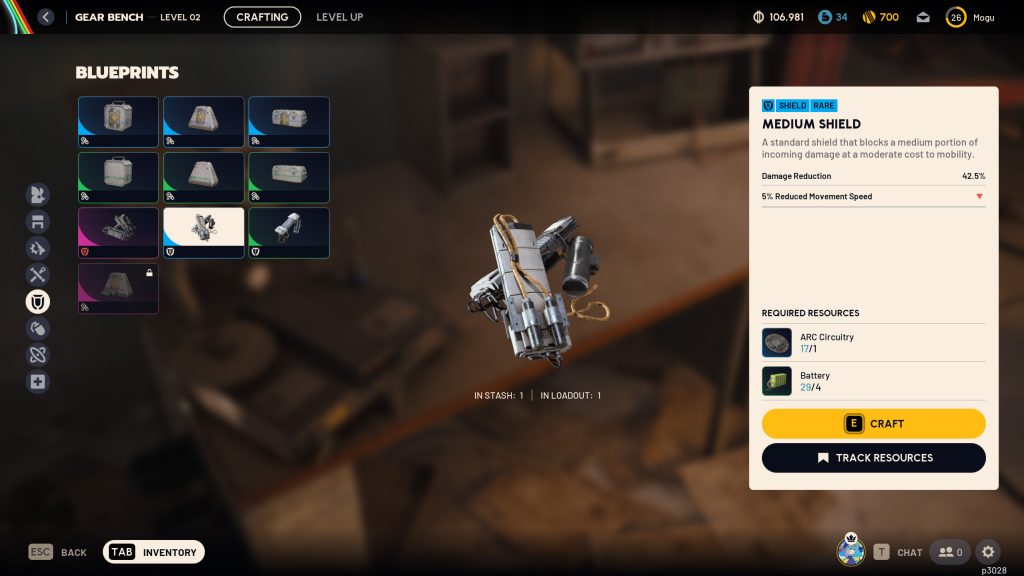
Gear Bench – Shields and Augments that define how you play. Augments can increase your backpack space, add Safe Pocket slots (which guarantee items come back even if you die), and modify your weight capacity. The Medium Shield at Level 2 is a game-changer for survivability.
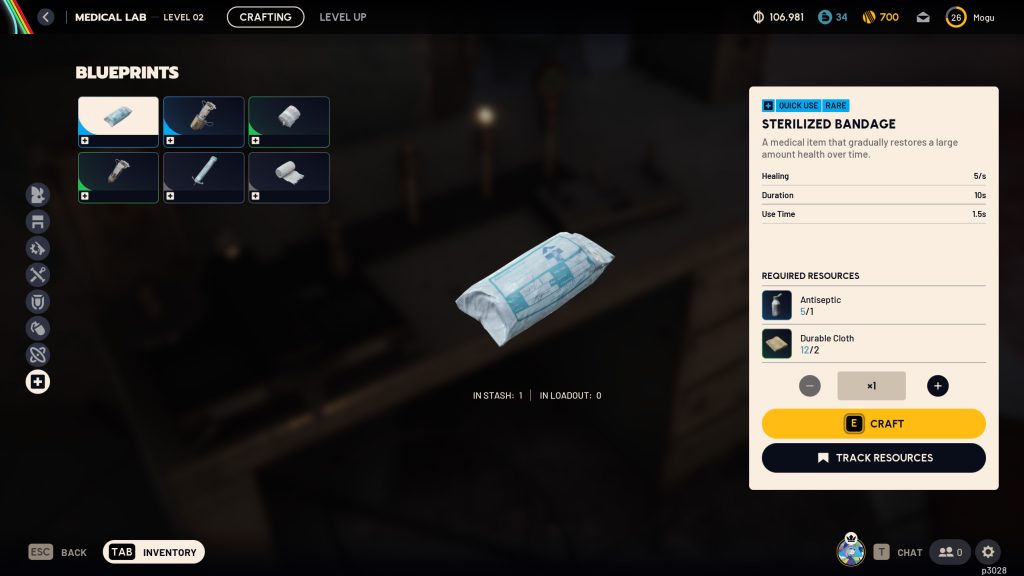
Medical Lab – Healing items and consumables. Early levels give you basic bandages and medkits, but Level 3 unlocks Vita Spray, which provides instant health restoration during combat instead of the slow heal-over-time from bandages.
Explosives Station – Grenades and mines for crowd control and area denial. Different grenade types can lure ARC units away, attach to flying enemies, or leave lingering fire damage in chokepoints. If you want to craft Wolfpacks some day, you’ll need this fully upgraded.
Utility Station – Tactical gadgets like Raider Hatch Keys (for safer, faster extractions), ziplines, barricades, and at Level 3, the Photoelectric Cloak for temporary invisibility.
Refiner – This bench converts low-quality materials into rare, high-tier components. It’s not flashy, but getting the Refiner to Level 2 is essential because you literally cannot reach Level 3 on most other benches without access to advanced components.
Required Upgrade Materials by Station
Scrappy Upgrades
Before we even get to the main benches, let’s talk about Scrappy the rooster. He passively generates materials while you’re offline or in raids.
- Level 2: 1 Dog Collar
- Level 3: 3 Lemons, 3 Apricots
- Level 4: 6 Prickly Pears, 6 Olives, 1 Cat Bed
- Level 5: 12 Mushrooms, 12 Apricots, 3 Very Comfortable Pillows
Gunsmith Materials
- Level 1: 20 Metal Parts, 30 Rubber Parts
- Level 2: 3 Rusted Tools, 5 Mechanical Components, 8 Wasp Drivers
- Level 3: 3 Rusted Gears, 5 Advanced Mechanical Components, 4 Sentinel Firing Cores
Gear Bench Materials
- Level 1: 25 Plastic Parts, 30 Fabric
- Level 2: 3 Power Cables, 5 Electrical Components, 5 Hornet Drivers
- Level 3: 3 Industrial Batteries, 5 Advanced Electrical Components, 6 Bastion Cells
Medical Lab Materials
- Level 1: 50 Fabric, 6 ARC Alloy
- Level 2: 2 Cracked Bioscanners, 5 Durable Cloth, 8 Tick Pods
- Level 3: 3 Rusted Shut Medical Kits, 8 Antiseptic, 5 Surveyor Vaults
Explosives Station Materials
- Level 1: 50 Chemicals, 6 ARC Alloy
- Level 2: 3 Synthesized Fuel, 5 Crude Explosives, 5 Pop Triggers
- Level 3: 3 Laboratory Reagents, 5 Explosive Compound, 3 Rocketeer Drivers
Related Reading: How to Beat Rocketeers
Utility Station Materials
- Level 1: 50 Plastic Parts, 6 ARC Alloy
- Level 2: 2 Damaged Heat Sinks, 5 Electrical Components, 6 Snitch Scanners
- Level 3: 3 Fried Motherboards, 5 Advanced Electrical Components, 4 Leaper Pulse Units
Refiner Materials
- Level 1: 60 Metal Parts, 5 ARC Powercells
- Level 2: 3 Toasters, 5 ARC Motion Cores, 8 Fireball Burners
- Level 3: 3 Motors, 10 ARC Circuitry, 6 Bombardier Cells
Best Upgrade Priority Order – Workshop Upgrade Priority
Here’s the progression path that will give you the fastest returns while keeping you alive long enough to actually extract your hard-earned materials.
First Priority: Gear Bench to Level 2
Survivability is everything in Arc Raiders. If you can’t stay alive long enough to extract, nothing else matters. The Gear Bench at Level 2 unlocks Medium Shields, which most players prefer over Heavy Shields for the better balance between protection and mobility. You’ll take significantly more punishment before going down, which translates directly into more successful extractions. The augments at this level also start offering serious quality-of-life improvements like increased backpack space and additional Safe Pocket slots. Building the Gear Bench is relatively cheap too—requiring only Plastic Parts and Fabric, both of which you’ll naturally accumulate in abundance.
Second Priority: Refiner to Level 2
This is your inventory management solution. Once you start hoarding materials for upgrades, your stash fills up fast. The Refiner lets you convert piles of common materials into condensed, high-tier components, which frees up massive amounts of storage space. More importantly, getting the Refiner to Level 2 unlocks your path to crafting advanced components, which are required for every single Level 3 upgrade on other benches. Without a functioning Refiner, you’re stuck farming rare drops and hoping for RNG.
Third Priority: Medical Lab to Level 2
Better healing options mean you can stay in raids longer and take more risks. The Medical Lab at Level 2 provides significantly improved healing items that restore more health and work faster than the basic bandages. This lets you sustain through longer firefights with ARC units and recover from PvP encounters without having to immediately extract. Early on, you’re going to be taking damage constantly while you learn the game, and having reliable healing makes the learning curve much less punishing.
After the Foundation: Round Out Your Workshop
Once you’ve got those three core upgrades, your playstyle dictates further choices. Getting Scrappy to Level 2 is cheap (just a Dog Collar) and provides passive material income. Level 2 Gunsmith unlocks crafting for more weapon blueprints found in the wild.
The key insight here is that the Gear Bench, Refiner, and Medical Lab form a triangle of survivability, sustainability, and progression. You can’t extract materials if you’re dead. You can’t manage materials if your stash is full. And you can’t progress without healing to support longer raids.
Critical Tips for Workshop Success
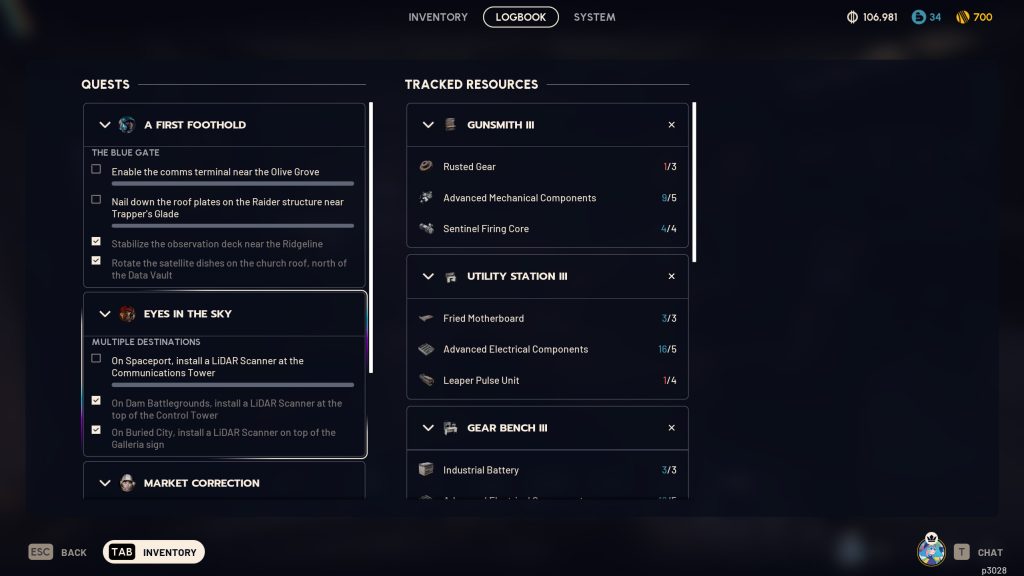
Always use Safe Pockets for rare materials. Losing a Rusted Shut Medical Kit or Fried Motherboard because you got third-partied during extraction will set you back. The game lets you track specific items you need for upgrades—use this feature diligently.
Avoid recycling or selling everything immediately. Some items that appear useless, like the aforementioned Rusted Shut Medical Kits, are actually required for vital upgrades. Check your Workshop requirements before breaking down uncommon items.
Blueprints must be extracted to work. Finding a rare blueprint is exciting. However, it means nothing if you die before getting back to Speranza. Put blueprints in your Safe Pocket the instant you find them.
Farm materials in batches. Plan your raids around your next upgrade goal. Need Electrical Components for Gear Bench Level 2? Head to Spaceport. Hunting for Mechanical Components? Dam Battlegrounds is your spot.
The Workshop does involve a grind; there’s no easy way around it. You need 555 total materials to max out everything, provided you aren’t crafting or buying anything. But with smart prioritization and focused farming, you can have a functional Workshop that actually supports your playstyle within your first 20-30 successful raids instead of struggling and wondering why you’re still dying constantly.