
You may not really give a second thought to the smaller enemies in Arc Raiders and for good reason, they’re generally not all that threatening. Until they are, that is. Sometimes in the right situation you can easily find yourself swarmed by a bunch of “easy” enemies and find yourself down and out.
The good news is that once you understand how these small ARC enemies work, they’re far less threatening than they appear. Each one has specific weaknesses, predictable behavior patterns, and drops that make them worth hunting down. Whether you’re completing The Trifecta quest or just trying to survive your first few raids, this guide breaks down everything you need to know about Ticks, Wasps, Hornets, and Snitches.
Understanding Small ARC Detection and Behavior
Before we dive into individual enemies, you need to understand how these machines actually see you. Every ARC unit in the game operates with a narrow 45-degree vision cone—think of it like a searchlight sweeping the area. They can see far, but they can’t see wide. Their detection state is shown through color changes: blue means passive patrol, yellow indicates they’ve heard something suspicious, and red signals active engagement.
Here’s the thing most players don’t realize: these robots can’t really hear you. Unless you’re practically stepping on them, they’re not going to suddenly turn and start shooting. The one exception is the Snitch, which has enhanced audio detection and will quickly alert nearby enemies if you’re not careful.
ARCs also don’t operate on a hivemind network. Alerting one Snitch only triggers its local patrol group, not every machine on the map. Use this to your advantage by picking off isolated units or pulling small clusters away from larger groups.
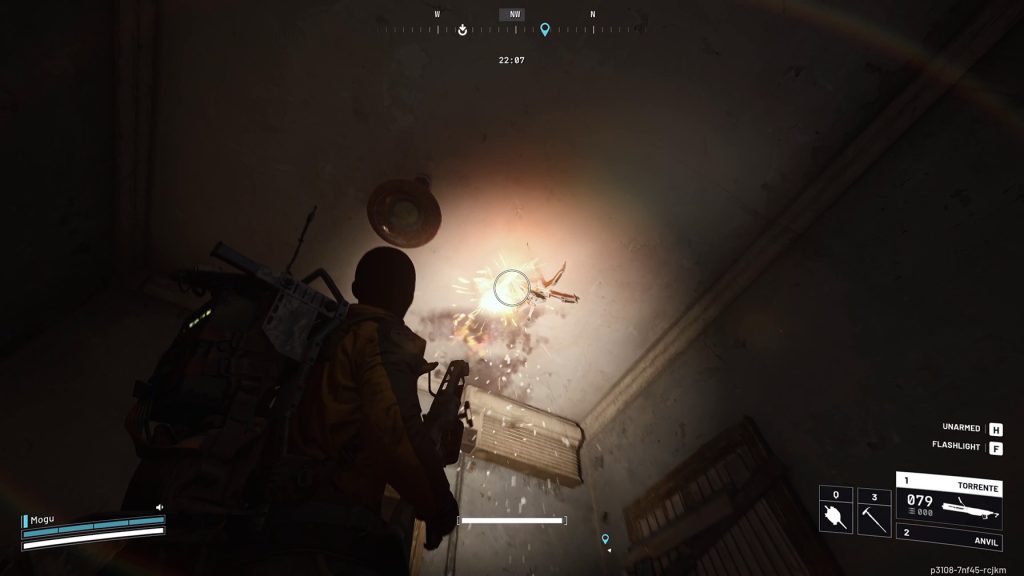
Ticks: The Ceiling Spiders
Ticks are the facehuggers of Arc Raiders. These spider-like robots lurk in dark corners of buildings, clinging to walls and ceilings in dimly lit areas. They’re found almost exclusively indoors—think the Dam Control Tower’s upper floors, apartment buildings in Buried City, or any structure with multiple rooms and tight corridors.
The main threat from Ticks isn’t their damage output. It’s the surprise. When you’re focused on looting a container or listening for other raiders, a Tick will leap from above and latch onto your face, dealing continuous damage until you throw it off. In the middle of a firefight with other ARCs or players, that moment of panic can get you killed.
The good news is that Ticks are incredibly fragile. A single shot from any weapon will destroy them. Even better, your melee Raider Tool can one-hit kill them silently, which is perfect for stealth runs. If one does manage to latch onto your face, rapidly tap the prompt to throw it off, then finish it immediately.
Combat Tips:
- Listen for their distinctive tapping sound and robotic chirps when entering rooms
- Scan ceilings, ledges, and dark corners before looting
- Use your melee tool for silent kills
- If grabbed, don’t panic—the throw-off prompt is quick
Loot Drops:
- Tick Pods (used for early quests and Equipment Bench upgrades)
- Mechanical Components
- ARC Alloy (occasionally)
Tick Pods are particularly valuable early on. You’ll need them for Shani’s quests and to upgrade your Equipment Station from Level 2 to Level 3.
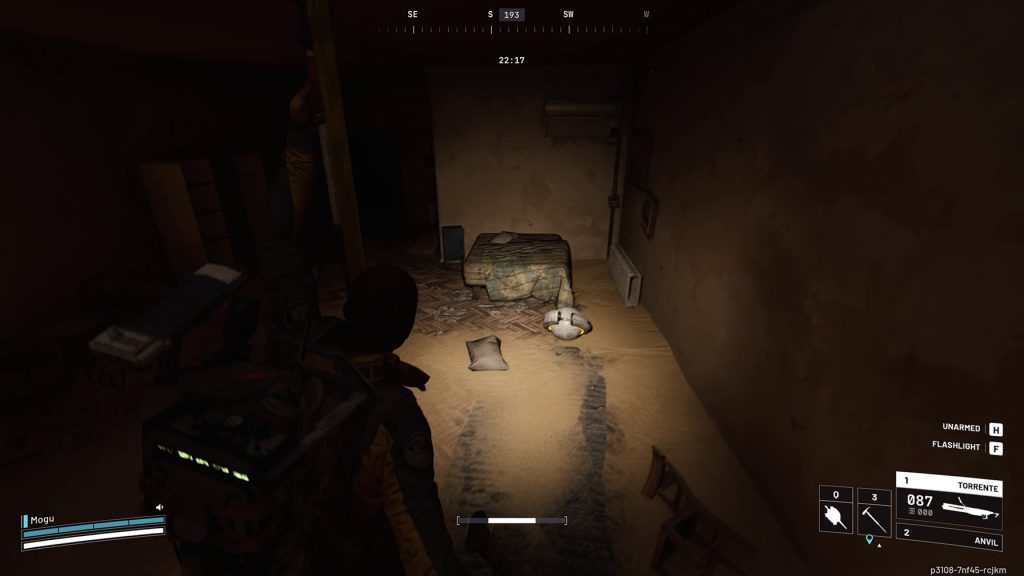
Pops: The Rolling Grenades
If Ticks are the ambush predators, Pops are rolling grenades. These unarmored roving droids have one purpose: barrel straight at you and explode at your feet for massive damage. They’re most commonly found in indoor areas, rolling through hallways and rooms at surprisingly high speeds.
The audio cues are what save you with Pops. When one spots you, it starts flashing a red light and emitting a beeping sound that rapidly increases in frequency as it gets closer. The faster the beeping, the closer it is to detonating. Think of it like a cartoon bomb’s timer—when the beeps blur together into a constant tone, you have about one second before it explodes.
The good news is that Pops are incredibly easy to kill. They have no armor whatsoever, and almost any weapon will destroy them in a few shots. Heavy ammo weapons like the Ferro can one-shot them. The trick is spotting them early and not panicking when you hear that distinctive beeping sound echoing down a hallway.
If you’re caught off guard and a Pop is about to detonate right next to you, you can time a dodge roll to avoid all the damage. The explosion has a specific radius, and your invincibility frames during the roll will carry you through it if your timing is good. Some players actually prefer to bait them in close and dodge at the last second to conserve ammo. Alternatively, get yourself up high by climbing on a box or two and they’ll generally just sit there and watch you.
Combat Tips:
- Listen for the beeping—faster beeping means imminent explosion
- Shoot them as soon as you see the red light
- Dodge roll at the last second if you’re out of position
- Clear doorways and corners before entering rooms
Loot Drops:
- Mechanical Components
- Electrical Components
- ARC Alloy (occasionally)
- Recyclable materials
Pops don’t drop unique components like Wasps or Hornets, so there’s no quest specifically requiring their parts. However, they’re still worth eliminating for the crafting materials, and more importantly, because leaving them alive while you’re looting is asking for an embarrassing death. Nothing quite matches the humiliation of extracting with high-value loot only to get blown up by a Pop you didn’t hear coming because you were checking your inventory.
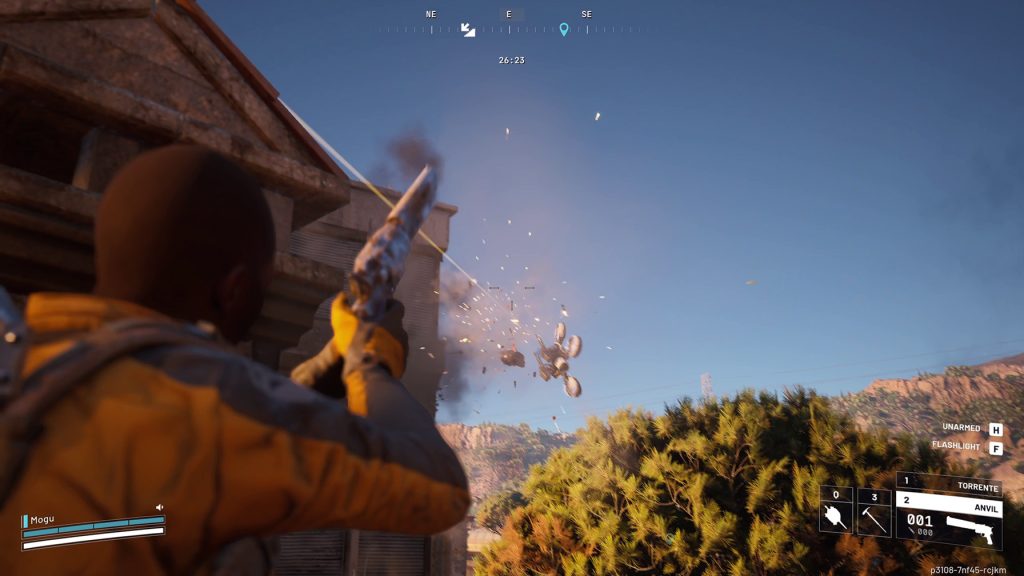
Wasps: The Sky Patrol
Wasps are the most common ARC enemy you’ll encounter in Arc Raiders. These small flying drones patrol the outdoor areas of every map, often in groups of 2-4 units. They’re equipped with rapid-fire guns that can shred your shields surprisingly fast.
Wasps are highly reactive to sound and movement. If they hear gunfire or explosions nearby, they’ll drift toward the noise to investigate. Even sprinting too close can trigger their patrol to break formation. When their search beam changes from blue to yellow, they’re actively hunting for the source. Once it turns red, you’re in their sights and they will not let up.
The key to dealing with Wasps is targeting their four exposed thrusters. These are their weak points, and destroying just two will send them spiraling out of control and crashing to the ground. Most weapons work fine against Wasps since they’re lightly armored—a short, controlled burst from a Rattler or even a few shots from a Ferro will drop them instantly.
Combat Tips:
- Always prioritize Wasps over Hornets when both are present (kill the faster threat first)
- Use cover aggressively—their attack pattern involves bursts of fire followed by brief pauses
- Aim for the body or any thruster—they’re not heavily armored
- Don’t fight multiple Wasps in the open; doorways and buildings give you huge advantages
Loot Drops:
- Wasp Drivers (required for The Trifecta quest and workshop upgrades)
- ARC Alloy
- ARC Power Cells
- Medium Ammo
The Wasp Driver is worth 2,000 credits if you sell it, but you’ll need at least two for Shani’s Trifecta quest. They’re also required for upgrading your workshop, so stash a few extras when you can.
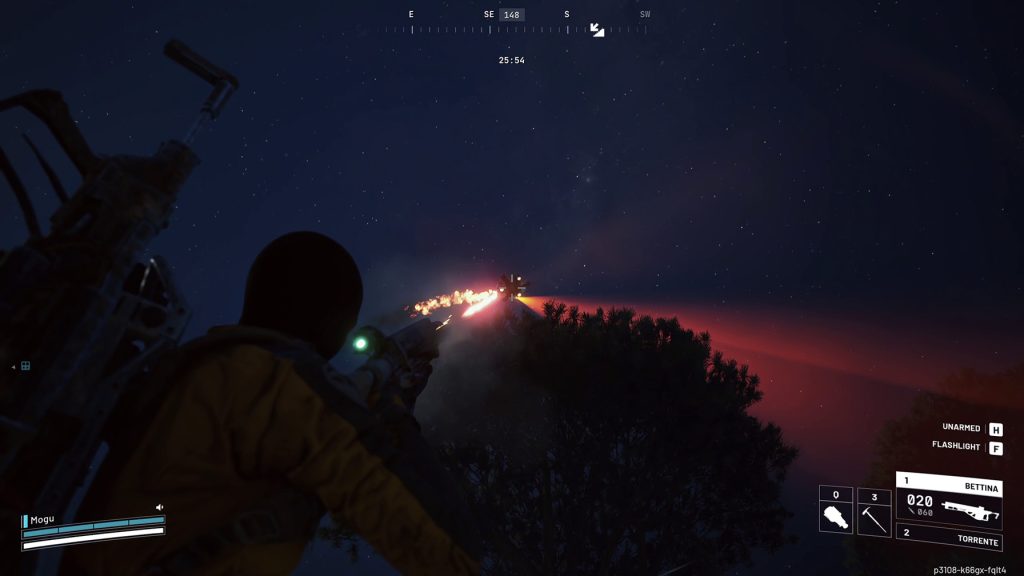
Hornets: The Armored Enforcers
If Wasps are the common patrol, Hornets are the elite units. These larger, darker drones are heavily armored and pack electrical darts that can stun you and obliterate your shields in seconds. They’re often found leading groups of Wasps or patrolling high-value areas and chokepoints.
The biggest mistake players make with Hornets is trying to shoot them from the front. Their front thrusters are protected by reinforced armor plating, and you’ll waste more ammo trying to break through. Instead, you need to flank them or wait for them to expose their vulnerable rear thrusters.
When a Hornet fires its electrical dart, there’s a brief audio cue. Listen for it and immediately duck into cover or dodge roll to the side. The dart moves in a straight line and can’t lead moving targets effectively, so running diagonally away from a Hornet will cause most of its shots to miss. While it may appear unusual, zigzagging across the battlefield will help most of their shots miss.
For the actual kill, you have two approaches. If you’re carrying heavy weapons like the Anvil or Ferro, target one front thruster and the opposite rear thruster to destabilize their flight pattern. If you’re using lighter weapons, position yourself directly underneath the Hornet during its reload cycles and shoot up at the exposed rear thrusters. You can also roll underneath them to get this angle.
Combat Tips:
- Rear thrusters are unarmored—always aim for the back
- Listen for the electrical dart charge-up sound and dodge immediately
- Run diagonally to avoid their shots (they can’t lead targets)
- Use medium to heavy ammo for efficiency
Loot Drops:
- Hornet Drivers (required for quests and valuable at 2,000 credits)
- ARC Alloy
- ARC Power Cells
- Medium Ammo
Hornet Drivers are useful for more than just selling. They can be used as a throwable item to temporarily stun enemies, which is incredibly valuable when you need to target weak spots on bigger ARCs like Bastions or Rocketeers.
Snitches: The Surveillance Problem
Snitches are not out to kill you—at least not directly. These reconnaissance drones scan large areas with their distinctive laser beams, and the moment they spot you, they start calling in reinforcements. Typically, you’ll get 2-3 Wasps and/or Hornets spawning to defend the Snitch, quickly transforming a quiet moment into a dangerous skirmish.
The Snitch’s scanner runs blue when passive, turns yellow when on alert, and flashes red when actively hostile. If you see that red beam sweeping toward you, you have maybe three seconds to destroy it before it completes its reinforcement call. The reinforcement signal is an audible long beep—once heard, expect reinforcements.
Unlike other small ARCs, the Snitch has decent hearing and will detect you from further away. It’s also unarmed, so your primary objective is disabling it before it summons backup. The weak points are its three wiper blades (or thrusters) around the central shaft. Destroy two of them and it’ll crash to the ground.
Combat Tips:
- Shoot from long range with heavy ammo (Ferro one-shots a thruster)
- Target the three outer wiper blades/thrusters
- Kill it quickly if you want to avoid a fight
- Intentionally trigger it if you’re farming Wasp/Hornet parts
Loot Drops:
- Snitch Scanner (2,000 credits, throwable that spawns hostile ARCs)
- ARC Alloy
- ARC Power Cells
The Snitch Scanner is one of the most interesting items in the game. It’s essentially a grenade that spawns hostile airborne ARCs at the location you throw it. This might sound useless, but it proves invaluable for setting traps for other raiders or farming specific ARC parts when you need them. Some players use it to create diversions near extraction points.
Small ARC Loot Value Table
Here’s a quick reference for what each small ARC drops and whether you should stash, sell, or scrap:
| Item | Value (Credits) | Best Use | Notes |
|---|---|---|---|
| Tick Pod | 640 | Stash | Equipment Bench upgrade (Level 2-3) |
| Wasp Driver | 1,000 | Stash (2x), then Sell | The Trifecta quest + workshop upgrades |
| Hornet Driver | 2,000 | Stash (2x), then Sell | The Trifecta quest + throwable stun item |
| Snitch Scanner | 2,000 | Stash | Unique throwable for spawning ARCs |
| ARC Alloy | 200 | Sell or Stash | Common crafting material |
| ARC Power Cells | 270 | Sell | Common drop, low priority |
| Mechanical Components | 640 | Scrap/Stash | Crafting material for various upgrades |
| Electrical Components | 640 | Scrap/Stash | Crafting material for various upgrades |
Best Farming Locations for Each Enemy
Ticks (For Tick Pods):
- Buried City – Attics (BEST – 2-3 Ticks per attic, southeast area)
- Dam Control Tower – Upper floors, dark rooms
- Stella Montis – Assembly, Medical Research, Lobby, Cultural Archives
- Spaceport – Indoor tunnels and corridors
- Hydroponic Dome Complex – Interior sections
Pops & Fireballs:
- Stella Montis (BEST – Medical Research, Assembly, Lobby)
- Dam Battlegrounds – Indoor areas
- Any high-loot building interiors
Wasps:
- Dam Battlegrounds (most common spawn)
- Blue Gate – Outdoor areas
- All maps – outdoor patrols near high-value zones
Hornets:
- Blue Gate – Near Checkpoint tunnel
- Dam Battlegrounds – High-value outdoor zones
- Often paired with Wasp patrols
Snitches:
- Dam Control Tower area
- High-value extraction zones (Spaceport, Ancient Fort)
- Blue Gate – Rooftop/open areas
Weapon Recommendations for Small ARCs
Best Overall: Ferro This common battle rifle might not look impressive, but it’s the perfect small ARC killer. Its heavy ammo and strong armor penetration allow for one-shot kills on Snitch and Wasp thrusters. While the break-action reload is slow, its precision is paramount for hitting moving targets, negating the need for spray-and-pray tactics.
Close Quarters: Vulcano. Ideal for Ticks in tight spaces or Wasps that get too close, this shotgun swiftly ends encounters.
Key takeaway for weapon choice: light ammo struggles against ARC armor. For Hornet engagements, opt for medium or heavy ammo.
Final Thoughts
Small ARCs in Arc Raiders are designed to be nuisances, not major threats. The real danger comes when you underestimate them or let them swarm you while you’re distracted. A single Wasp is trivial to deal with. Four Wasps plus two Hornets called in by a Snitch while you’re trying to extract? That’s how runs end.
Fortunately, farming these small ARCs is a highly reliable method for early-game resources. Wasp and Hornet Drivers fetch good prices, and their components are crucial for workshop upgrades.
Frequently Asked Questions
Wasps have 4 exposed thrusters that serve as weak points. Destroying any 2 thrusters will destabilize their flight and cause them to crash. All 4 thrusters take equal damage, so aim for whichever you can hit most easily. Light, medium, or heavy ammo all work effectively.
Ticks spawn exclusively indoors, clinging to walls and ceilings in dark areas. The best farming location is Buried City attics (southeast area), where you’ll find 2-3 Ticks per attic. Other good locations include Dam Control Tower upper floors, Stella Montis Medical Research/Assembly, and Spaceport tunnels.
Hornets cannot lead their shots, so running diagonally away from them causes most attacks to miss. When you hear the electric dart charge-up sound, immediately dodge roll sideways or duck into cover. The dart travels in a straight line and hits hard, so movement is key.
Snitches are unarmed reconnaissance drones that call in reinforcements when they spot you. They summon 2-3 Wasps and/or Hornets after completing their alert signal (a long beep). You have about 3 seconds to destroy the Snitch before backup arrives. Target its 3 wiper blades around the central shaft.
Hornet front thrusters are heavily armored. Always flank to target the exposed rear thrusters, or wait underneath during reload cycles. If forced to fight from the front, use heavy weapons like Anvil or Ferro and target one front thruster plus the opposite rear thruster to destabilize flight.
The Trifecta is an early-game quest from Shani requiring you to destroy and extract with parts from a Wasp, Hornet, and Snitch. Rewards include 9,000 XP, a Raider Hatch Key, 2 Defibrillators, and a Dam Control Tower Key. Dam Battlegrounds is the best map to complete it.
Yes. Tick Pods are worth 640 credits and are required to upgrade your Equipment Bench from Level 2 to Level 3. They also recycle into useful crafting materials (ARC Alloy and Mechanical Components). Early game, stash every Tick Pod you find for workshop upgrades.
Yes. When a Pop’s beeping reaches maximum frequency (about 1 second before detonation), you can dodge roll through the explosion using invincibility frames. However, it’s safer to shoot them from range. Heavy ammo one-shots them, and they’re unarmored.
No. ARCs don’t operate on a hivemind network. Alerting one Snitch only triggers its local patrol group, not every machine on the map. Each ARC has a 45-degree vision cone and operates independently unless part of the same patrol group.
The Ferro battle rifle is the best all-around choice. Its heavy ammo and armor penetration allow one-shot kills on Wasp/Snitch thrusters. For close quarters (Ticks/Pops), the Vulcano shotgun excels. Avoid light ammo weapons as they struggle against ARC armor, especially on Hornets.